How to Download and Install the NordVPN App on Windows 11: Quick Guide, Tips, and Troubleshooting
How to download and install the nordvpn app on windows 11: a quick and clear process you can follow in minutes, plus options for setup, troubleshooting, and staying secure online.


Quick fact: installing NordVPN on Windows 11 takes just a few steps and gets you protected fast. In this guide, you’ll find a straightforward, step-by-step path to download, install, activate, and optimize NordVPN on Windows 11. We’ll cover:
- Where to download the app
- How to install with minimal friction
- How to sign in and connect to a VPN server
- How to use extra features like Kill Switch, WireGuard/ChaCha8, and split tunneling
- Common issues and quick fixes
- Quick setup tips for safe, reliable protection
Useful resources text only: Apple Website - apple.com, Artificial Intelligence Wikipedia - en.wikipedia.org/wiki/Artificial_intelligence, NordVPN Support - support.nordvpn.com, Windows 11 Official - microsoft.com, NordVPN official site - nordvpn.com, Community forums - reddit.com/r/nordvpn Where is my location how to check your ip address with nordvpn
- Why Windows 11 users should consider NordVPN
- Strong encryption: NordVPN uses AES-256-GCM with 4096-bit RSA keys for handshake, which is the standard most security-conscious users trust.
- Large server network: Over 5,000+ servers in 60+ countries give you plenty of options for speed and access.
- Features that matter: Kill Switch, DNS leak protection, double VPN routes, and Obfuscated servers for restrictive networks.
- User-friendly: One-tap connect, easy profile switching, and a clean Windows app that feels native.
- Prerequisites and quick prep
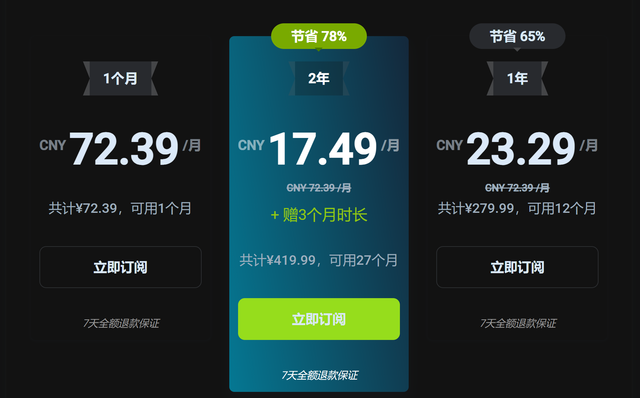
- A NordVPN account: You’ll need a subscription. If you don’t have one yet, you can start a trial or pick a plan on nordvpn.com.
- Compatible Windows 11 device: Ensure your OS is up to date Settings > Windows Update.
- Stable internet: A reliable connection helps the download and installation go smoothly.
- Step-by-step: Download, install, and sign in
- Step 1: Download
- Go to nordvpn.com and click Get NordVPN or Download. Choose the Windows app you’ll typically get a .exe installer.
- If you’re navigating from a blog or affiliate link, you might see the same download button; proceed as you would on the official site.
- Step 1: Download
- Locate the downloaded file usually in Downloads and double-click NordVPNSetup.exe.
- If Windows asks for permission, click Yes to allow the installer to run.
- Follow the on-screen prompts: agree to the license, choose any optional shortcuts, and finish the installation.
- Launch the NordVPN app after installation.
- Sign in with your NordVPN account email and password.
- On first run, NordVPN may prompt to enable protections like Kill Switch and DNS leak protection. Turn these on for maximum safety.
- In the app, you’ll see a big power button. Click it to connect to the best server automatically, or use the server map or search to pick a country or city.
- For streaming, gaming, or privacy, you can switch to specialized servers e.g., Optimized for Streaming or P2P.
- Deep dive into Settings to adjust:
- Kill Switch: Keep you safe if the VPN drops.
- Protocols: WireGuard recommended for speed or ChaCha useful on weaker devices or networks.
- Auto-connect: Reconnects VPN on startup or when you reconnect to the internet.
- Split tunneling: Route specific apps through VPN while others stay direct.
- Tips for better performance and security on Windows 11
- Use WireGuard or NordLynx for speed: This protocol tends to outperform traditional OpenVPN on most networks, especially for streaming or gaming.
- Enable Kill Switch: If your VPN connection drops, Kill Switch blocks internet traffic to prevent leaks.
- Check for DNS leaks: NordVPN includes DNS leak protection, but it’s good to verify after any network change.
- Auto-connect on startup: Enable this so you’re protected as soon as Windows starts, not after you manually connect.
- Regularly update the app: NordVPN pushes updates with security fixes and feature improvements. Keep the app up to date.
- Common issues and quick fixes
- Issue: NordVPN won’t launch or crashes on startup
- Fix: Reboot Windows, run the installer as administrator, or reinstall the app. Check for Windows updates and ensure .NET or related components aren’t blocked.
- Issue: NordVPN won’t launch or crashes on startup
- Fix: Try a different server, switch protocols WireGuard vs OpenVPN, or disable firewall temporarily to test if it’s blocking VPN traffic.
- Fix: Switch to a nearby server, use WireGuard, and disable bandwidth-heavy apps on your network. Check your baseline internet speed outside VPN to gauge the delta.
- Fix: Ensure DNS leak protection is on, or switch to automatic DNS settings within NordVPN. Reconnect after applying changes.
- Fix: Allow the NordVPN app through Windows Firewall, and ensure it’s not blocked by antivirus software.
- Fix: Test by disconnecting VPN to see if traffic is blocked; if not, re-check Kill Switch settings and keep the app updated.
- Advanced features to maximize value
- Obfuscated servers: Use these in networks that block VPN traffic or on restrictive networks e.g., schools or workplaces.
- Multi-Device sync: A single subscription often covers multiple devices; use Windows, macOS, iOS, Android, and Chrome extensions simultaneously.
- Double VPN optional: For added privacy by routing traffic through two servers; keep in mind this can slow down speeds.
- Dedicated IP optional: If you need a consistent IP address for certain services, NordVPN offers dedicated IP options in some regions.
- Security and privacy considerations on Windows 11
- Privacy settings: Windows 11 includes telemetry and data-sharing options. While NordVPN protects your traffic, you should also review Windows privacy settings to limit telemetry when possible.
- Avoid free VPNs: Free options often come with data caps, slower speeds, and questionable privacy practices. NordVPN is a paid service with a clear privacy policy.
- Two-factor authentication: Enable 2FA on your NordVPN account for extra protection against account compromise.
- Keeping everything organized: a quick checklist
- Have your NordVPN account ready and confirm your subscription.
- Download the Windows app from the NordVPN site or official store links.
- Install with default options or customize to enable Kill Switch and DNS protection.
- Connect to a server and test your IP with an online IP checker to confirm you’re routed through the VPN.
- Enable auto-connect and explore split tunneling if you need per-app routing.
- Regularly update the app and Windows 11 to stay protected.
- Quick comparison: NordVPN vs other VPNs on Windows 11
- NordVPN advantages:
- Large server network, strong encryption, and user-friendly Windows app.
- Fast performance with WireGuard-based NordLynx protocol.
- Comprehensive security features Kill Switch, DNS leak protection, obfuscated servers.
- NordVPN advantages:
- Slightly pricier than some budget VPNs, but with more features and reliability.
- Some servers may have inconsistent performance depending on distance and load.
- Real-world usage scenarios
- Streaming from regions with geo restrictions: Use optimized servers to access content libraries.
- Secure public Wi-Fi: Always connect via NordVPN on public networks to protect data in transit.
- Remote work: Access corporate resources securely without exposing internal traffic.
- Gaming: Choose nearby servers with NordLynx for low latency.
- How to verify your VPN status after setup
- Check IP address: Use a reputable site to verify your visible IP matches the NordVPN server location.
- Check DNS: Ensure the DNS requests are not leaking to your ISP.
- Test Kill Switch: Temporarily disconnect the VPN and ensure no traffic leaks before the app automatically reconnects.
- Maintenance and best practices
- Schedule periodic reviews of your VPN settings, especially if you change networks or devices.
- Backup recovery codes for 2FA in a secure place.
- Review your browser and app permissions to ensure no unnecessary data sharing.
- Affiliate note and call-to-action If you’re ready to protect your Windows 11 experience with NordVPN, consider using our trusted link to get started. This helps support content like this and keeps you protected. NordVPN—protect your online life with a click. For an easy access point, explore the NordVPN landing page and consider trying a plan that fits your needs.
Frequently Asked Questions
How do I download NordVPN on Windows 11?
Download NordVPN from the official NordVPN site, run the installer, and follow the on-screen prompts to install the app on Windows 11.
Do I need to create an account to use NordVPN?
Yes, you’ll need a NordVPN account to sign in and activate your subscription.
Can I use NordVPN on multiple devices with one plan?
Yes, most NordVPN plans support multiple simultaneous connections across devices and platforms.
Which protocol should I use on Windows 11?
NordVPN recommends NordLynx WireGuard for best speed and stability, with options to switch to OpenVPN if needed. Speedtest vpn zscaler understanding your connection speed and beyond
Is Kill Switch important?
Yes. Kill Switch prevents traffic leaks if the VPN connection drops, keeping your real IP hidden.
How do I know NordVPN is connected on Windows 11?
The app shows a big connect button; when connected, you’ll see the server location and status clearly displayed in the main window.
How can I test for DNS leaks?
Run a DNS leak test from a reputable site after connecting to NordVPN to ensure DNS requests are routed through the VPN.
What should I do if NordVPN won’t connect?
Try a different server, switch protocols, restart the app, or reinstall. Check firewall settings and ensure Windows updates are current.
Can I bypass geo-restrictions with NordVPN on Windows 11?
Yes, many geo-restricted services work when connected to NordVPN servers in the intended region. Why Your Azure VPN Isn’t Working: A Troubleshooter’s Guide to Fixing Common Issues
How do I enable Kill Switch on the Windows app?
Open Settings in the NordVPN app, find the Kill Switch option, and toggle it on for automatic protection.
Sources:
Torrentio not working with your vpn heres how to fix it fast and other VPN tips for torrenting
Nord vpn申请退款的完整指南:流程、条件与注意事项
大巨蛋 球賽 門票 購買全攻略 2026 最新資訊:購票流程、時程、價位與安全小撇步
Letsvpn 快连:VPNs 全方位指南,帮你安全上网、提升隐私与访问速度 Urban vpn google chrome extension a complete guide: easy, practical insights and tips
暨南大学webvpn:校外访问校内资源的安全指南与实用技巧